

LEDs and matrices
LED strips
Wire an addressable LED strip to the board and describe it in the configurator: which pin it is on, how many lamps it has and how it is mounted.
A board can drive up to four LED devices — strips and matrices together — each on its own pin. What the lamps show is set up with layers.
What you need
- An addressable LED strip. The configurator knows two kinds: WS2812B (WS2812, WS2813 and WS2815 strips take the same signal and count as the same kind) and SK6812 RGBW, which has a fourth, white lamp in each chip.
- Three wires to the input end of the strip: power, ground (GND) and data (DIN). WS2812B and SK6812 strips run on 5 V, WS2815 strips on 12 V.
- Enough power. One lamp at full white draws about 60 mA, so 30 lamps can draw about 1.8 A. A computer’s USB port gives about 500 mA in total, and the board’s own screen needs part of that. The configurator works out what your strip can draw (see Brightness below).
Wire the strip
- 1Unplug the board from USB.
- 2Connect the strip’s GND to a GND pin of the board.
- 3Connect the strip’s power wire. A few lamps at low brightness can take 5 V from the board’s 5 V pin, where it has one (labelled 5V or VBUS). For more lamps, use a separate supply of the strip’s voltage, and connect the supply’s ground to the board’s GND as well: without a shared ground the strip cannot read the data.
- 4Connect the strip’s DIN to one of the free pins of your board from the table below. The arrows printed on the strip point away from the input end.
| Board | Free pins for LED devices |
|---|---|
| LilyGO T-Display-S3 | 1, 2, 10, 11, 12, 13, 16, 17, 18, 21 |
| Guition ESP32-4848S040 | 1, 2, 40, 41, 42 |
| Guition JC1060P470C | 1, 2, 3, 4, 5, 20, 32, 33, 45, 46, 47 |
| Espressif ESP32-S3-DevKitC-1 | 4 to 18, and 21 |
The configurator offers only these pins, and the board refuses any other.
Add the strip in the configurator
- 1Press Add strip on the LEDs tab of Modules. The board does not have to be connected for this, but it has to be for the lamps to light.
- 2The bin icon on the strip’s chip removes the strip at once, without asking.

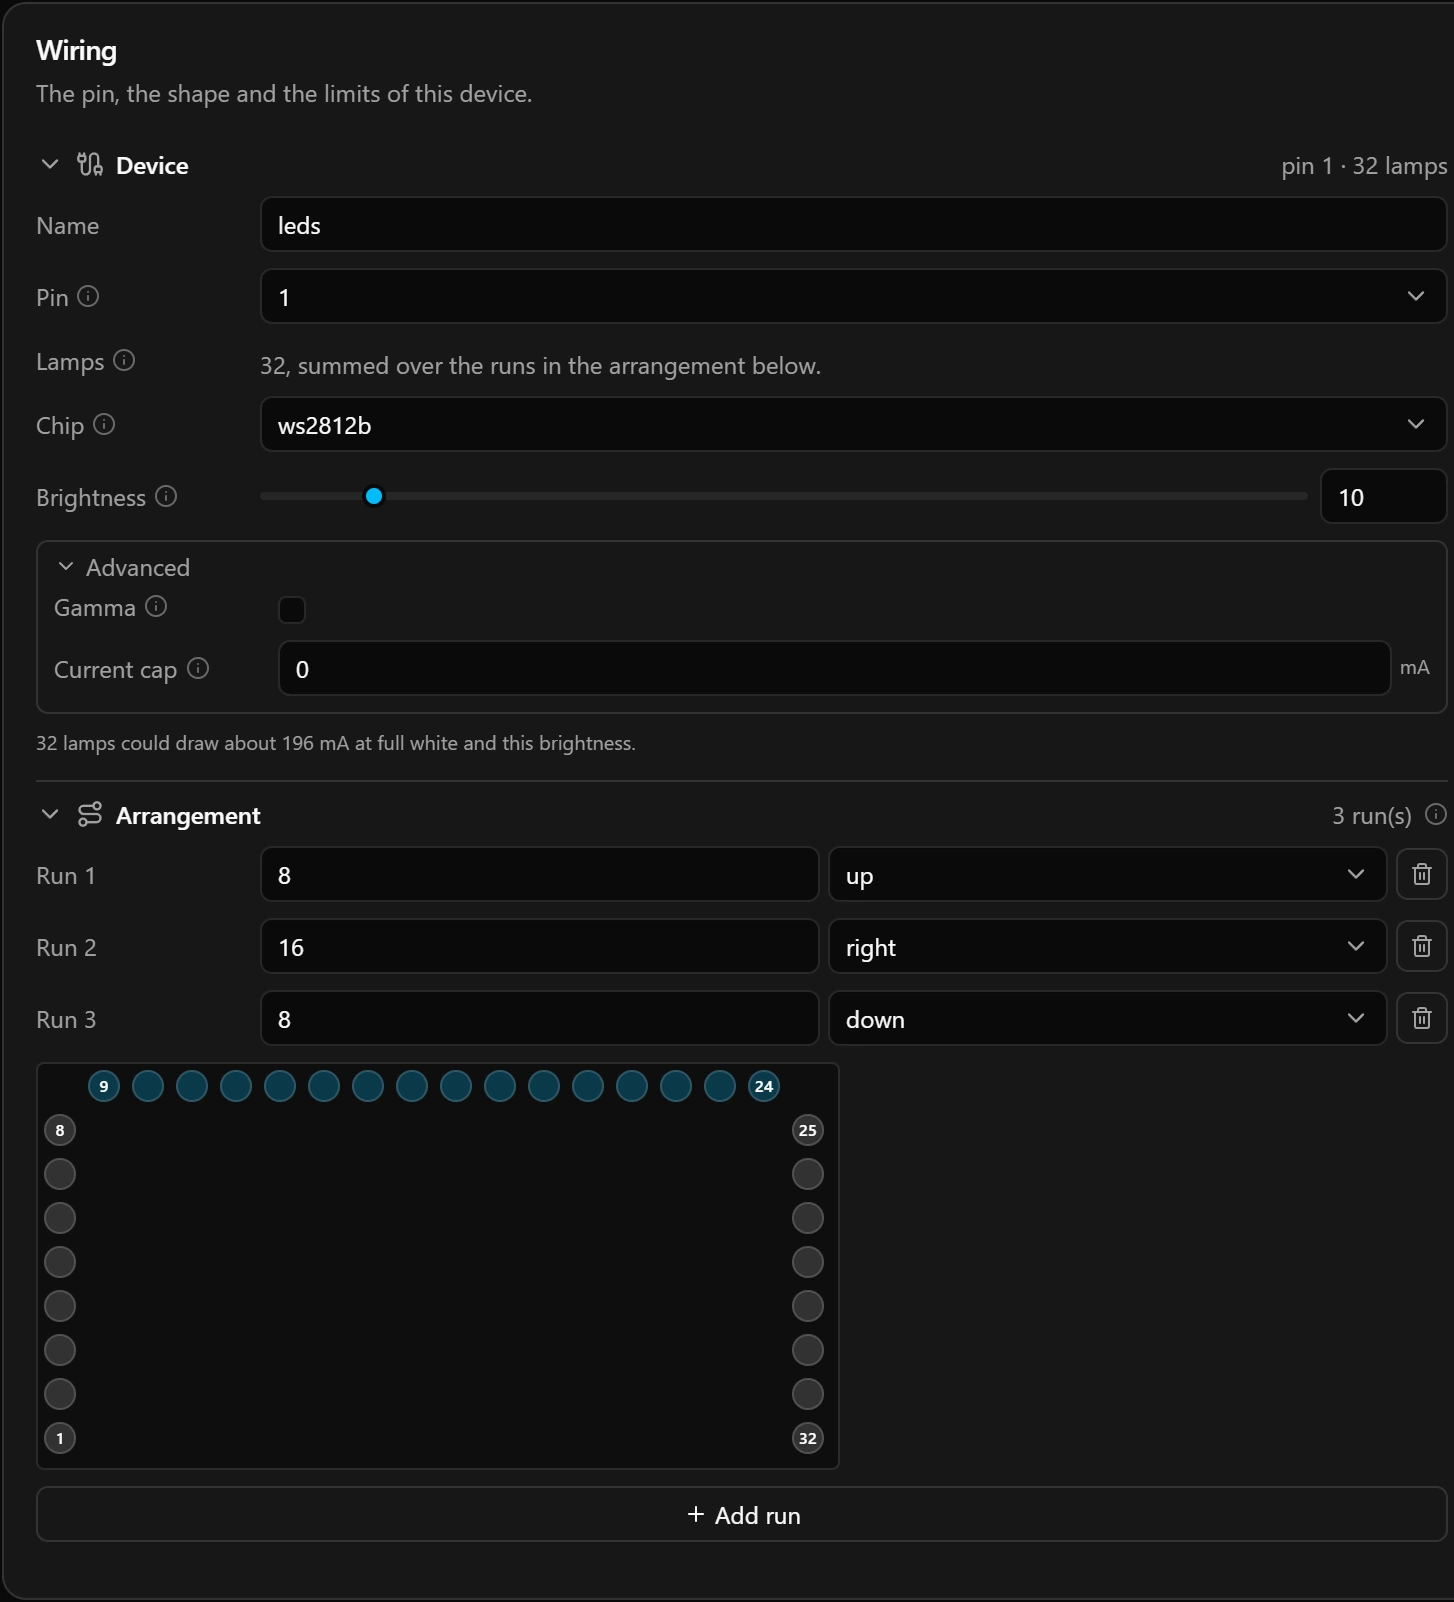
- 1Lamps: once you add runs below, this becomes the sum of the runs, which must add up to the whole strip.
- 2Chip: there is no colour-order setting: these chips all expect the same one.
- 3Brightness: it applies to everything the strip shows. The line under the fields estimates the current at full white.
- 4Advanced: Gamma makes dim colours fade smoothly instead of jumping in steps. Current cap is a limit in mA: above it the board dims the whole strip evenly. 0 means no limit.
- 5Arrangement: how the strip is mounted, as straight runs of lamps, each with a direction.
Lamps are numbered in the order the data flows: lamp 1 is the one the DIN wire goes into.
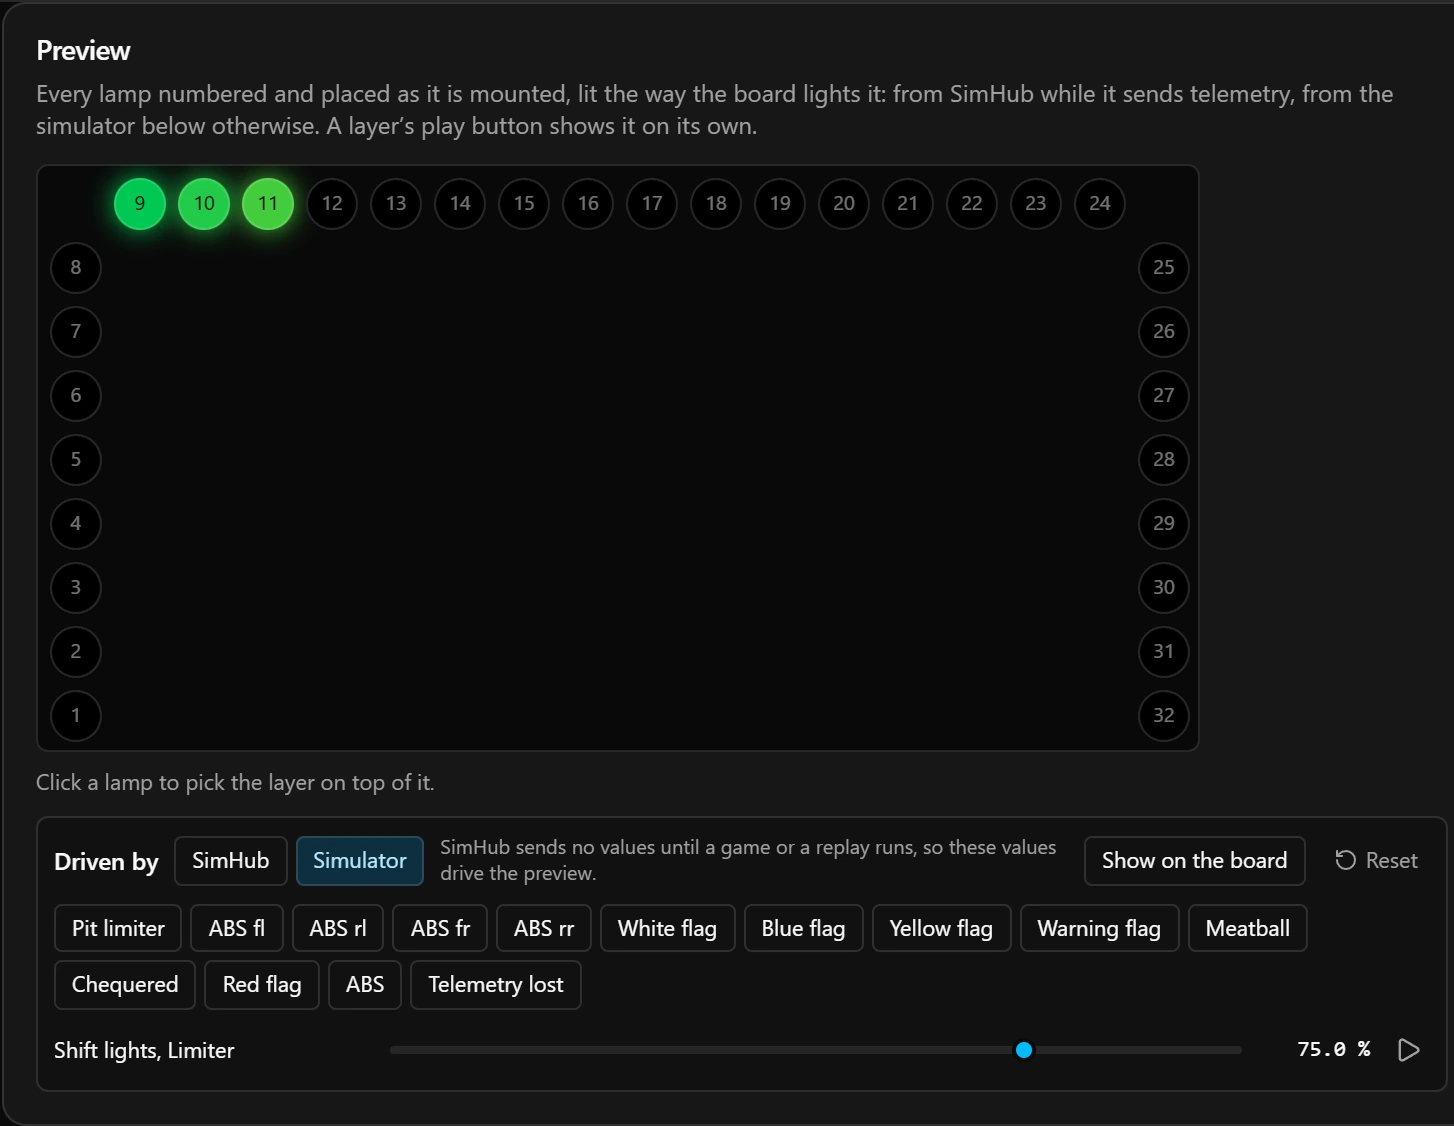
Good to know
- If the map does not look like your strip, change the runs. The board itself ignores them: they shape the drawings in the configurator and show up as ready-made lamp ranges when you add a layer.
- Making a strip shorter also trims every layer that used the lamps past the new end.
- Lamps are counted from 1 in the configurator. A saved configuration file counts them from 0.
Limits
| What | Limit |
|---|---|
| LED devices per board, strips and matrices together | 4 (3 on the ESP32-S3-DevKitC-1) |
| Lamps per strip | 1 to 512 |
| Lamps on one board, all devices together | 1024 |
| Runs per strip | 8 |
| Name of a strip or a matrix | 15 characters |
| Current cap | 100 to 20 000 mA, or 0 for no limit |