

LEDs and matrices
LED matrices
Add an LED matrix panel, describe how its lamps are wired and how it is mounted, and show the gear, flags, pictures and digits on it.
Pitrig treats an LED matrix as a device of its own, on its own pin, with its own layers and pictures. The electrical side is the same as for a strip and is described in LED strips; this page covers what differs.
Wire the matrix
Connect the panel as a strip. A matrix packs many lamps close together: an 8 × 8 panel at the starting brightness of 50 % can draw about 1.9 A at full white, far more than a USB port gives. Power it from a separate 5 V supply and set a Current cap.
Add the matrix
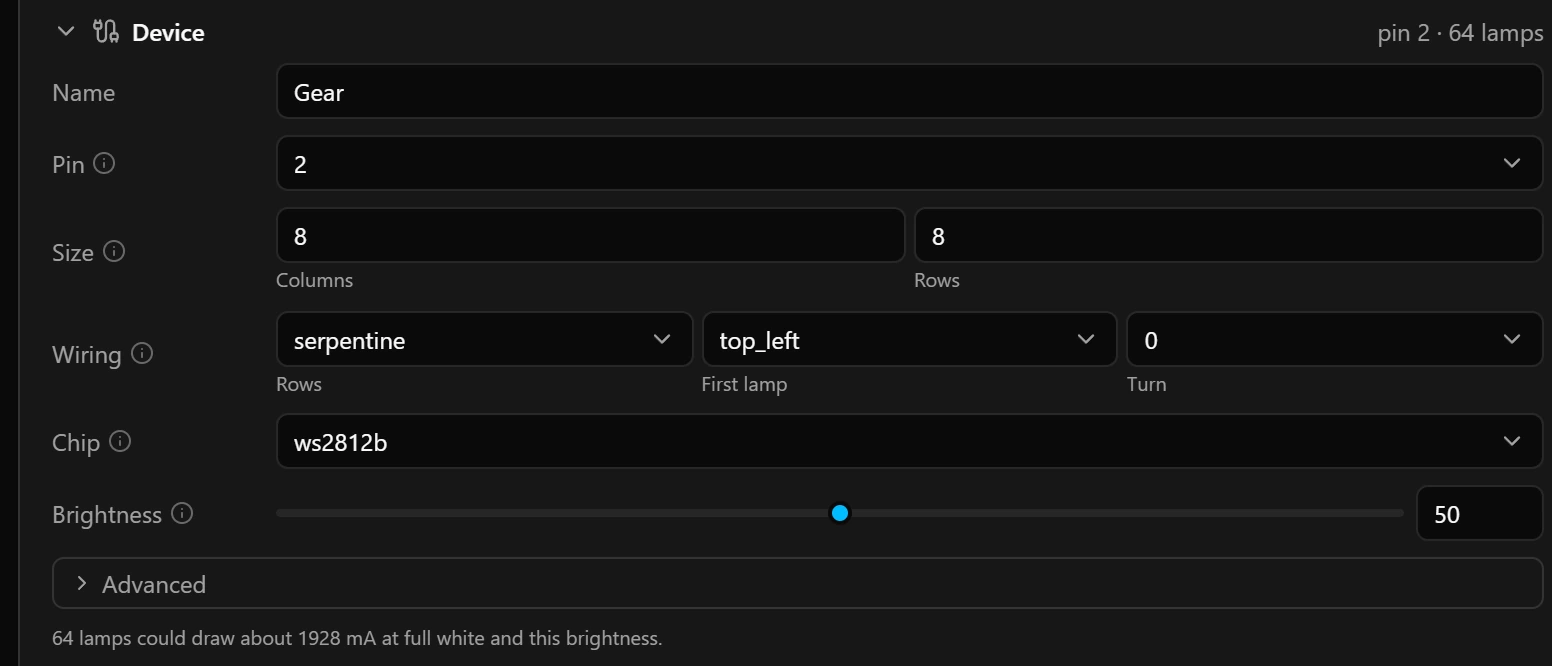
Size and wiring
| Field | What it means |
|---|---|
| Size | Columns and Rows of the panel as it is built, not as it is mounted: a 16 × 8 panel standing on its end is still 16 columns and 8 rows, with a Turn. |
| Rows under Wiring | serpentine: every second row runs back the other way, as on most ready-made panels. progressive: every row starts at the same side. |
| First lamp | The corner of the panel, as it is built, where the data line goes in. |
| Turn | Turns everything drawn on the panel, so a panel mounted on its side or upside down still reads the right way up. |
The map above the tabs draws the panel as it is mounted, numbered in wiring order. Compare it with the arrows printed on the back of the panel.
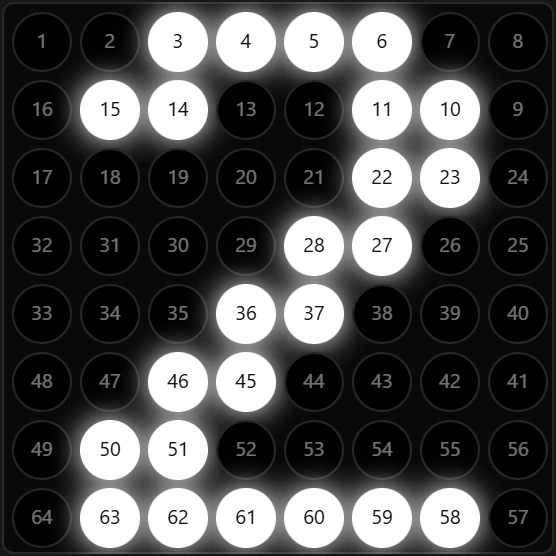
serpentine rows and the first lamp top left: lamps 1 to 8 run to the right along the top row, and 9 to 16 run back along the second.Check the wiring
The map on screen always looks right, because it draws the panel as you described it. Whether the description matches the real panel shows only on the panel itself. Check it with a moving dot:
- 1Connect the board, so that it shows every change.
- 2On the Layers tab, press Add layer… and choose Custom layer. The whole panel turns light blue.
- 3Set Paints to
animation, Motion tochaseand Pass to10000. Now one lamp at a time lights, slowly enough to follow on an 8 × 8 panel; give a larger panel a longer Pass. - 4Watch the panel: the lit lamp should run along the top row from left to right, then along each row below it, the way you read a page.
- 5If it does something else, change the Wiring tab as the table below says, and watch again.
- 6When it runs right, remove the test layer with the bin on its row.
| On the panel the lamp… | Change |
|---|---|
| starts in another corner, or runs from right to left | First lamp |
| runs every second row the wrong way | Rows under Wiring |
| runs up or down the columns instead of along the rows | Turn, then First lamp if needed |
Layers on a matrix
Layers work on a matrix as on a strip, see LED layers. Only gradient, steps, gauge and animation layers differ: they run across their pixels row by row from the top left, the way you read a page, so a steps layer lights the top rows first.
Choose the pixels
In place of Lamps, a layer on a matrix has Shows on: a grid of the panel as it is mounted.
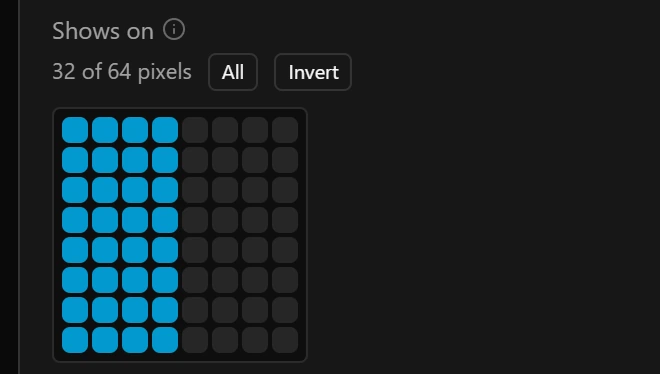
- 1A layer keeps at least one pixel.
With the layer picked on the Layers tab, clicking and dragging on the lamp map does the same. A text layer is drawn in the middle of the smallest box around its pixels, so a gear on the left half of the panel sits in the middle of that half.
Digits and letters
A text layer draws in a face, a set of character shapes, built into the firmware, so it needs no font upload. The faces carry the digits 0 to 9, N and R, which is what a gear readout needs; any other character stays dark but still takes up its space.
| Field | What it does |
|---|---|
| Binding | A number is shown rounded to a whole number. While the game sends no such value, only Text shows. |
| Text | Shown before the value, or alone without a binding. A text layer needs a Text or a Binding. |
| Face | The 4x6 faces draw each character 4 lamps wide and 6 high, the 6x8 faces 6 wide and 8 high. One dark column separates the characters. |
| Scroll step | Text wider than its pixels scrolls from right to left, one column every Scroll step. Text that fits stands still in the middle. |
On an 8 × 8 panel one character fits in any face. Two characters in a 4 × 6 face need 9 columns, so they scroll.
The gear
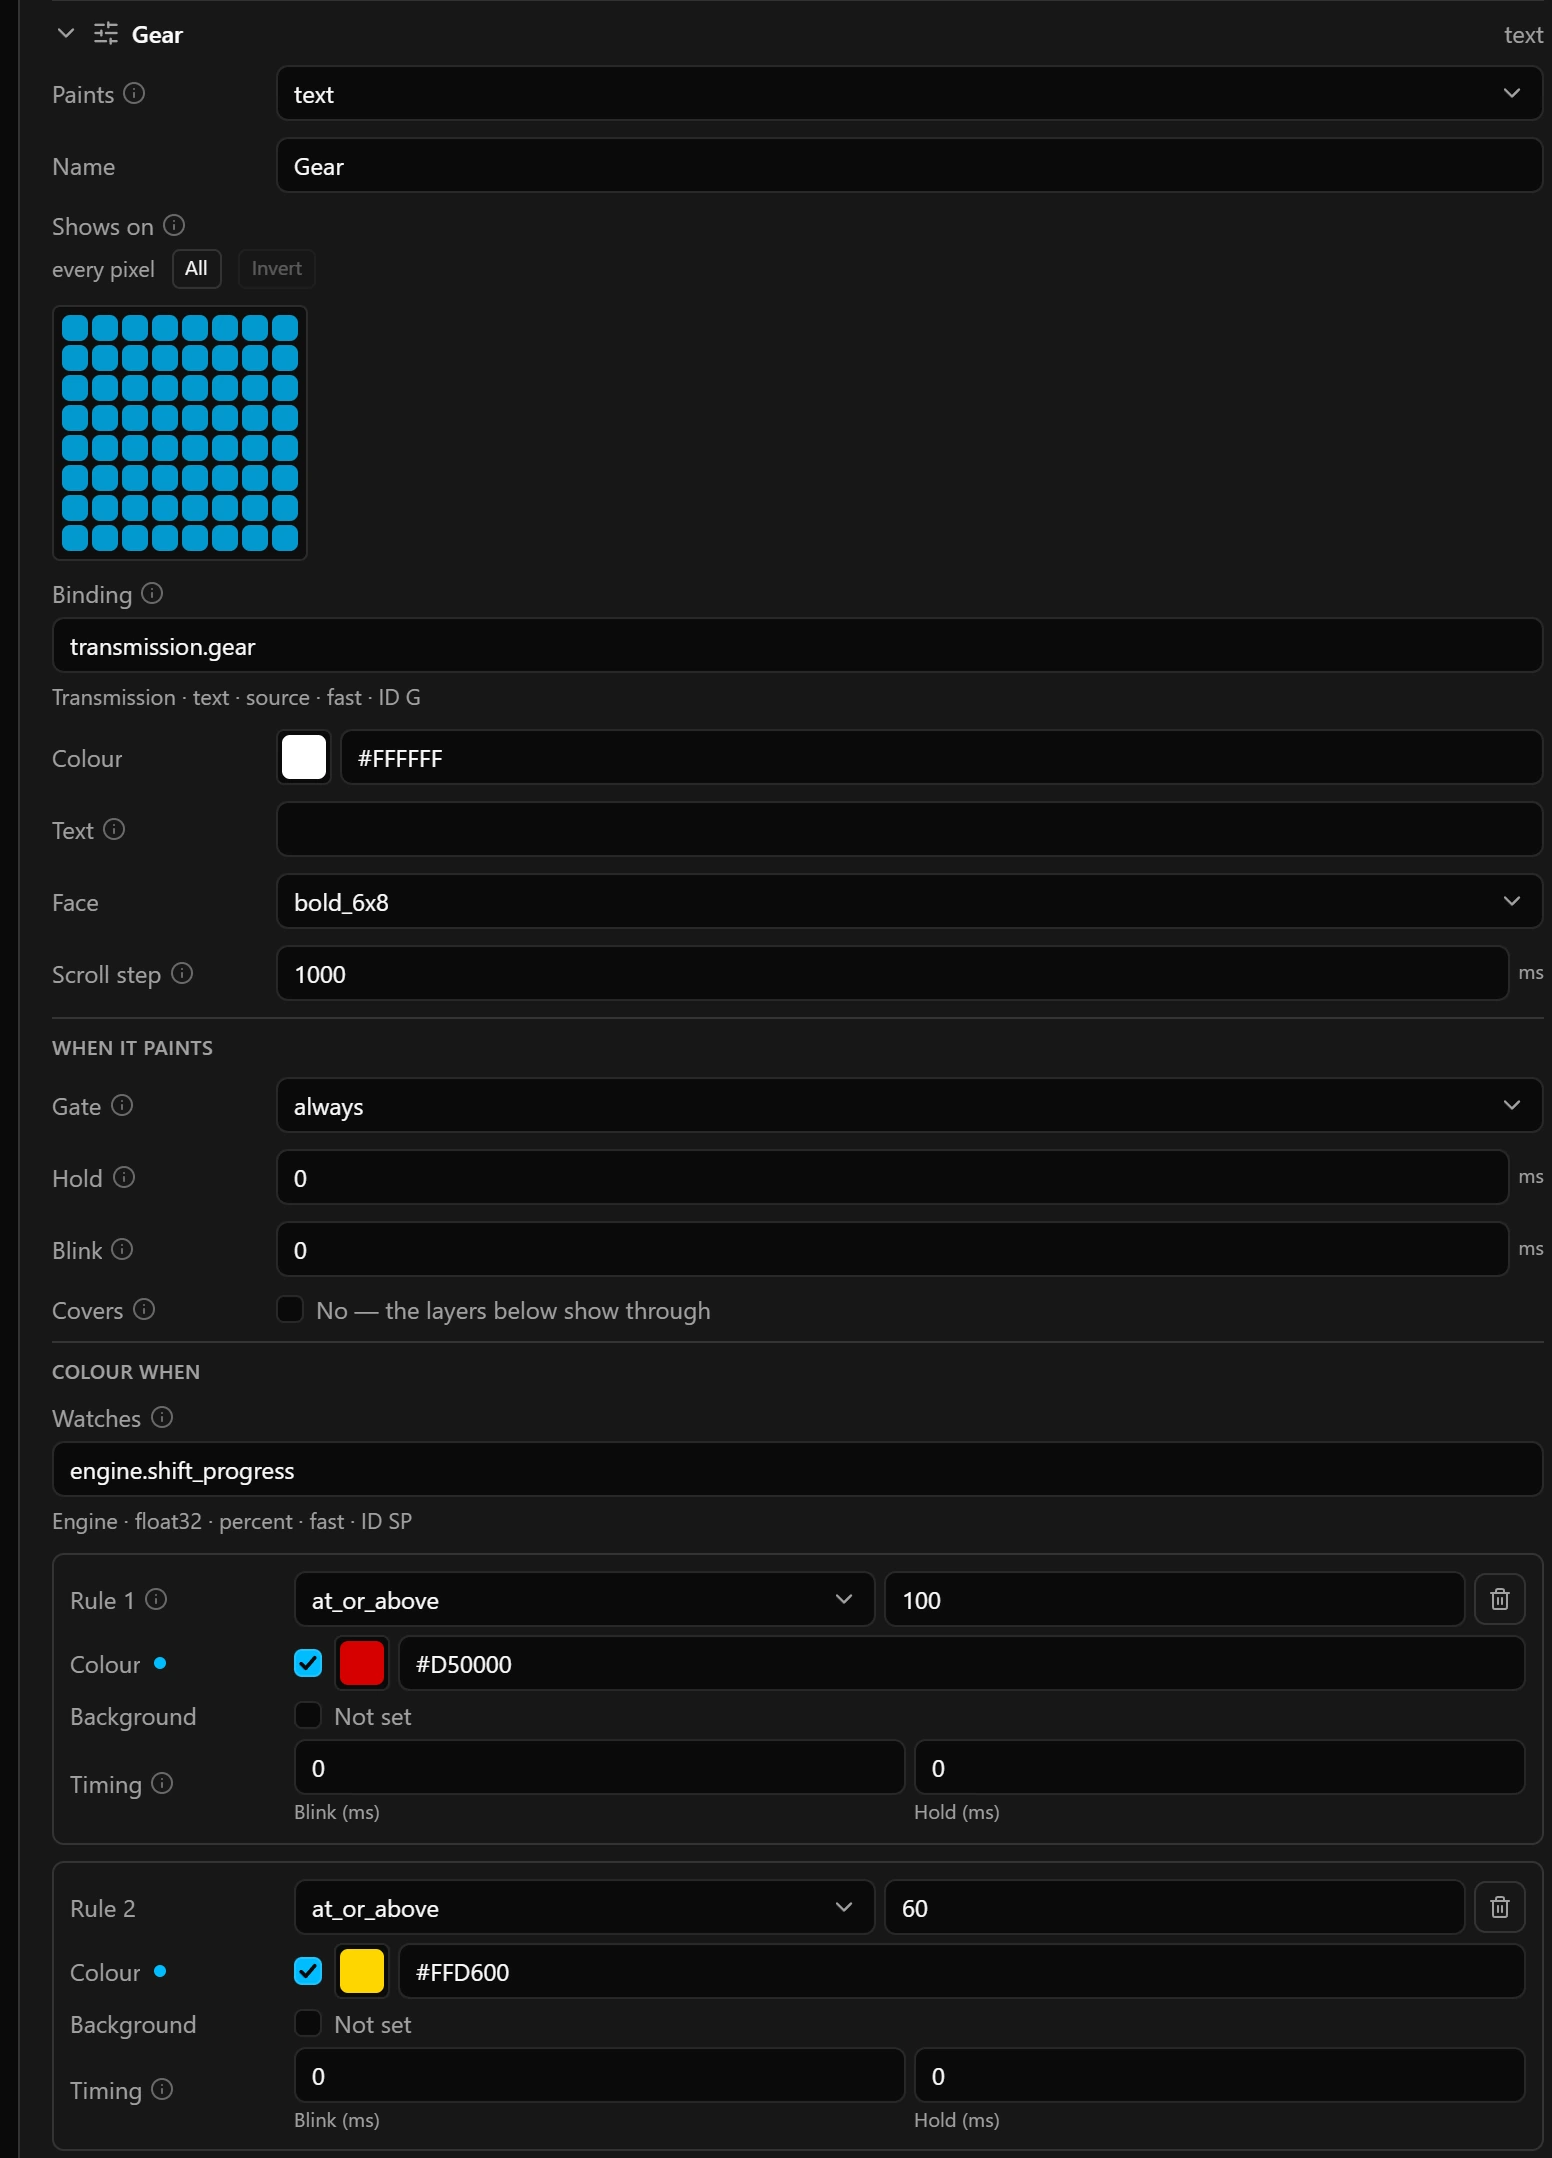
The Gear card in Add layer… makes a ready text layer: the gear from transmission.gear, in bold_6x8 when the panel is at least 6 columns wide and 8 rows high and in bold_4x6 otherwise, white, turning amber from 60 % of the way to the shift point and red at 100 %. Choose another Face on the layer to make it smaller.
Pictures
A matrix shows icons, flags and short animations: see Pictures and animations.
Good to know
- Changing Size or Turn keeps each layer’s chosen pixels where they were on the panel: they turn with it, and new rows or columns are not added to them. A layer on every pixel stays on every pixel.
- Pictures keep their own size when the panel changes. Fit panel on the Pictures tab makes one the size of the panel again.
Limits
| What | Limit |
|---|---|
| Columns and rows | 1 to 16 each |
| Lamps per matrix | 256, at 16 × 16 |
Text of a text layer | 31 characters |
| Scroll step | 50 to 60 000 ms |
| Characters the faces draw | 0 to 9, N and R |